

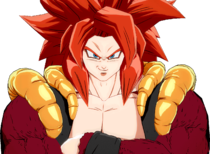
Super Saiyan 4 Gogeta Dragon Ball Fighterz
Overview
Overview
Gogeta (SS4) is the ultimate tribute to a long history of Dragon Ball fighting games, and was ofttimes designed as a "concluding boss" character in them. This idea was retained for DBFZ; Gogeta is given stupendous normals, staggering utility tools, and unique mechanics. He is the but character in FighterZ to have two airdashes, and can routinely buff his super harm with his unique cancellable taunt, Finish Sign. The move stacks levels, and leveling him up to level vii grants the privilege to utilise the definitive, instant killing, 100x Large Bang Kamehameha; this prompts the opponent to chase Gogeta downward even at their ain peril to stop him from reaching level 7.
Gogeta'due south gameplan is solid and foolproof. He doesn't have any methods to zone characters out, but fortunately he tin just bypass any said situation with his projectile invincible Lightning Hammer, ensuring Gogeta stays in his opponent's face up where he wants to be. Any player that wants to parade their superior fundamentals and fight like a cocky bastard will revel at SS4 Gogeta and his glorious red pilus. He is often considered ane of DBFZ's Meridian 5 characters, proving once and for all he is the ultimate fusion! (Unlike those other two.)
Note: Not to be confused with his approved Dragon Brawl Super counterpart, SSB Gogeta. To differentiate the 2, some refer to SS4 Gogeta as "Goget4", "4Geta" or "SS4."
| "I am neither Goku nor Vegeta. I'chiliad the guy who'south going to finish you!" | |
| Lore: | In a bid to cease the almighty shadow dragon, Omega Shenron, both Goku and Vegeta unified with the Metamoran fusion trip the light fantastic toe to nativity Gogeta, the ultimate fusion. With the combined power of two Super Saiyan Fours, he literally dominated Omega Shenron, utterly draining him of his power. Unfortunately, Gogeta was unable to cease off Omega Shenron before defusing, however the temporary victory was instrumental in the shadow dragon'due south eventual defeat. |
| Phonation: | Japanese: Masako Nozawa/Ryō Horikawa English: Sean Schemmel/Christoper Sabat |
Playstyle
| | |
| Pros | Cons |
|
|
| Gogeta (SS4) iv🔰A rating of how beginner friendly this character is out of 5, co-ordinate to Dustloop Wiki editors. | |
|---|---|
| |

A Second Airdash
Gogeta 4 can airdash twice without prior requirements (e.1000. an install like Golden Frieza). This allows him to jump and airdash twice, or double leap and so airdash, but he cannot airdash and so double spring.
Normal Moves
5L
-

So nice you'll wanna do it twice
-

Great mash anti-air
-

Even meliorate mash anti-air
-

Crosses up on hitting
| Version | Damage | GuardHow this attack tin exist guarded. | SmashWhich type of cinematic this attack can trigger. | StartupShows how many frame that the corresponding move needs to become through in order to reach its active frames. | ActiveShows how many frames where at that place is an attackbox, AKA the hitbox where if the opponent touches information technology, they will have damage. Occurs subsequently Startup. | RecoveryShows how many frames that the character must go through afterward its active frames to automatically go back to a neutral stance. | Frame Adv.The difference between the attacker's recovery and the period that the opponent is in blockstun. This Frame Reward value is based off the fact that the very beginning agile frame touches the opponent. Throws list the corporeality of Frame Advantage upon successfully throwing the opponent. | Invul.The number of frames this attack has invulnerability, and what attribute(s) this invulnerability applies to. |
|---|---|---|---|---|---|---|---|---|
| 5L | 400 | All | - | half-dozen | 3 | 12 | -3 | - |
| 5LL | 700 | All | - | ix | - | - | -4 | - |
| 5LLL | 500×two | All | U3+ | 15 | three | 17 | -4 | ane-17 Head |
- 5L
- Practiced range for a jab
- Hits loftier enough to check opponents after a blocked superdash.
Standard speed 5L. Very nice for stagger pressure.
- 5LL
- 5L > 5LL volition become Reflected twice, pushing Gogeta back to full screen. Delaying 5LL will get in Reflect proof.
- Hits the entire smear, besides as a expert distance above him.
Insane button. Big, sweeping high hitbox that can take hold of opponents behind Gogeta also, which tin then lead straight into his 5LLL. Since it's a 5LL, it is a medium unscaled starter. It tin can be low profiled by some 2L and 2Ms, but that's simply almost its only fault.
- 5LLL
- Sideswaps on hitting.
- Frame 4 anti-air. This with 5LL makes whiffing his autocombo pretty prophylactic against superdash.
Amazing anti-air. Extreme directional tracking allows it to easily snuff out aerial approaches and continue combos even when the 5LL launches high. Being unscaled too makes this an accommodating great multi-purpose button. Although it still requires yous to input 5LL beforehand, giving it technically high startup. On the vivid side, it'south all the same safe on block.
Its directional tracking is then wild that an aerial hit of 5LL, when positioned correct below your opponent, allows the 5LLL to instantly side bandy, where the follow upwardly hit will and so side bandy again to keep the combo moving in the same management. This, every bit y'all may expect, provides a massive corporeality of corner carry, functioning every bit a sold followup to vanish, such equally after 236S.
5M
-

Consider round start solved
| Damage | GuardHow this assail can exist guarded. | SmashWhich type of cinematic this assail can trigger. | StartupShows how many frame that the respective move needs to go through in order to reach its active frames. | AgileShows how many frames where there is an attackbox, AKA the hitbox where if the opponent touches it, they will take impairment. Occurs subsequently Startup. | RecoveryShows how many frames that the character must become through after its active frames to automatically go back to a neutral opinion. | Frame Adv.The difference between the attacker's recovery and the flow that the opponent is in blockstun. This Frame Advantage value is based off the fact that the very beginning agile frame touches the opponent. Throws list the corporeality of Frame Reward upon successfully throwing the opponent. | Invul.The number of frames this attack has invulnerability, and what attribute(southward) this invulnerability applies to. |
|---|---|---|---|---|---|---|---|
| 700 | All | - | nine | 4 | 17 | -5 | - |
- Catches whatever leap except Superjump Dorsum at round start.
The Ragna Push button. Long range, loftier hitting 5M with fast startup. Being -5, you tin also stagger with it. It will put you back at around the range yous used it once it recovers, just you'll ordinarily be in range to threaten with a 2M gatling or a 2L pressure reset. An overall excellent 5M, one of the best in the game forth with Vegito, Developed Gohan and Kid Buu'southward.
Astonishing equally a roundstart option due to its speed, gatlings, and potential impairment output. An like shooting fish in a barrel roundstart with this move is 5M > 2H , as it gives y'all plenty of time to hitconfirm and either Superdash on hit or cancel into a special movement on block for continued pressure.
5H
-

Huge range frametrap
5S
-

If looks could impale, yous'd be expressionless already
| Damage | GuardHow this attack can be guarded. | SmashWhich type of cinematic this attack can trigger. | StartupShows how many frame that the corresponding move needs to go through in order to reach its active frames. | ActiveShows how many frames where in that location is an attackbox, AKA the hitbox where if the opponent touches it, they volition accept harm. Occurs after Startup. | RecoveryShows how many frames that the graphic symbol must go through after its active frames to automatically go back to a neutral stance. | Frame Adv.The departure betwixt the assaulter'due south recovery and the period that the opponent is in blockstun. This Frame Reward value is based off the fact that the very first agile frame touches the opponent. Throws list the amount of Frame Advantage upon successfully throwing the opponent. | Invul.The number of frames this assault has invulnerability, and what attribute(s) this invulnerability applies to. |
|---|---|---|---|---|---|---|---|
| 400 | All | - | 13 | 6 | 17 | -7 | - |
- Tracks in front end of Gogeta up until half-screen and around jump superlative. Has enough hitstun to combo into Super Dash.
- Projectile level ane with Ki Blast holding. On frame 12-17, the projectile has an extra hitbox that deflects other Ki Blasts which can leads to interesting interactions.
-
On one hand, this deflect belongings allows 5S to vanquish other Ki Blasts regardless of their projectile level (i.e. things like
 Android 21 5S
  Guard:
All Startup:
13 Recovery:
Full 37 Advantage:
-4 ). On the other manus, deflecting counts every bit "blocking" for the opponent, so they will exist able to cancel into things they couldn't take had it been a disharmonism.The projectile'due south hitbox takes priority over the deflect hitbox, which means when overlapped, projectile clashing will happen earlier deflecting.
- Testing against a Level 1 Ki Boom: On frame 12, a deflect volition take identify, on frame thirteen-18, it'd be a clash instead.
- Testing confronting a Level 2 Ki Boom: Frame 12: Deflect. Frame thirteen-17: Clash > Deflect on the same frame. Frame 18: Clash and lose.
A good tool to control space, reset pressure, extend strings, and more than. Information technology'due south great to catch airborne opponents who are jumping around in front of you lot and forcing them into the ground, or just putting something out that tin can't be counterpoked. Recovery is quite fast unlike the airborne version, but there'south even so a gap where Gogeta can be punished so spamming it is ill-advised.
2L
-

Godly stagger tool.
2M

2H
-

Deceptively huge
6M
-

Completely overshadowed by the post-obit move
6H
Saiyan Kick
-

6H: All-purpose normal
-

6H~6H: Overhead for crackin' skulls
-

6H~3H: Low for bustin' kneecaps
| Version | Harm | GuardHow this assail tin can be guarded. | BoomWhich type of cinematic this attack can trigger. | StartupShows how many frame that the corresponding move needs to go through in order to reach its active frames. | ActiveShows how many frames where there is an attackbox, AKA the hitbox where if the opponent touches it, they volition take damage. Occurs later Startup. | RecoveryShows how many frames that the character must go through after its active frames to automatically go back to a neutral stance. | Frame Adv.The difference between the aggressor's recovery and the period that the opponent is in blockstun. This Frame Advantage value is based off the fact that the very showtime agile frame touches the opponent. Throws listing the amount of Frame Advantage upon successfully throwing the opponent. | Invul.The number of frames this assail has invulnerability, and what attribute(s) this invulnerability applies to. |
|---|---|---|---|---|---|---|---|---|
| Saiyan Kick 6H | 600 | All | - | 11 | 4 | 20 | -8 | - |
| Head Crusher 6H > 6H | 500 | Loftier | - | 20 | - | - | -5 | - |
| Leg Breaker 6H > 3H | 600 | Depression | - | 26 | - | - | +two | - |
- 6H
- Jump cancellable on hit.
- Late cancellable into follow-ups. At minimum, 6H~6H has a 5f gap on block, while 6H~3H has an 11f gap.
- High hitstun on air hit.
Very high hitting normal, much similar Adult Gohan'southward 3H but better because of its nowadays follow-ups. The follow-up concatenation is a large part of Gogeta's pressure, as he can practice a lot hither for mix-ups. Follow-ups can be backdashed mid-screen, but you can answer those with 5H. Gogeta's 214X moves volition also take hold of backdash after this move, simply they're more risky to endeavor if your opponent is ready for them. Can too exist good for extending Gogeta'southward blockstrings, or for his corner rejumps every bit 6H hits somewhat loftier, which allows him to convert off of his corner strings.
Because of the minimum five frame gap, nigh whatever movement after volition probable be beat cleanly by reversals unless Gogeta commits to his counter, DP, or blocking instead of the usual follow-ups. Blocking comes with its own chance in that 6H is -8, just 6H~6H is usually plenty to discourage mashing.
As a last annotation, remember in your strings and combos the followups are merely tardily-cancellable. The overhead and depression are actually a lot faster than you lot think, but delaying them for more than a few frames is impossible due to the brake. This besides helps yous in feinting, as information technology'southward a lot harder to tell what Gogeta is going for.
- 6H~6H
- Basis bounces on hit, tin be converted with H/South normals or specials.
- Just combos from 6H on air hit (like after a 2M). Otherwise it will reset opponents.
Fast overhead, will automatically catch people attempting to brew out of the chain. Delaying the push can make it harder to react to this and 3H, but doing and then leaves Gogeta broad open. Decent combo filler if yous desire to continue your opponent close to the footing for assists, only using this solo forces yous to spend your Superdash earlier than 6H > jump-cancel does.
- 6H~3H
- Launches on hit. Has very high hitstun that permit Gogeta to link into 2M.
Considerably slower than the overhead and leaves a large gap. Fortunately, it's plus on block and has high hitstun. Being +2, it gives about the same situation as 214M/H. Gogeta being plus, he can go for a reflect proof cord, bait out options, or mix-upwardly the opponent.
6S
Stop Sign
-

New Unique Mechanic: Taunting
| Damage | GuardHow this attack can be guarded. | SmashWhich blazon of cinematic this assault tin can trigger. | StartupShows how many frame that the respective motion needs to become through in order to reach its agile frames. | ActiveShows how many frames where in that location is an attackbox, AKA the hitbox where if the opponent touches it, they will have impairment. Occurs after Startup. | RecoveryShows how many frames that the graphic symbol must go through afterward its active frames to automatically go dorsum to a neutral stance. | Frame Adv.The difference between the attacker'southward recovery and the flow that the opponent is in blockstun. This Frame Advantage value is based off the fact that the very first active frame touches the opponent. Throws listing the amount of Frame Advantage upon successfully throwing the opponent. | Invul.The number of frames this attack has invulnerability, and what aspect(s) this invulnerability applies to. |
|---|---|---|---|---|---|---|---|
| - | - | - | - | - | Total 52 [Total 46] | - | - |
- Stands however and taunts. Gains level and cancelable into Vanish on frame 15. Gains 10% Ki guess and cancelable into other actions on frame 32.
- When canceled into, loses the get-go 6F of its blitheness, and can be cancelled before (Total 52 → 46, Level on 15, Meter on 32 → 26)
- Each level gained adds a bit damage to Gogeta's side by side Super (~60 minimum damage)
Grapheme defining. You can taunt in neutral, in blockstrings, and in combos. While the total animation is rather long, y'all tin continue yourself safety by canceling into Vanish very early while nevertheless getting the Level. Yous also have a frame 4 counter and a DP to shut down the opponent'due south counterattack attempts. Don't exist afraid to greenbacks out on Supers either, since it's not hard to build Levels back up peculiarly if you have assists to cover you.
In a blockstring, any G/H/S normals > 6S will get out an 11F window to counterattack (or a full 27F for them to react). If non overused, 6S can be used to reset cord very efficiently. Mid-philharmonic, it's possible to exercise ground normals > 6S > Vanish and go both the Level up and the wall bounciness from Vanish.
Once at Level 7, Gogeta gains an Instant Impale Super, which is likely what you're aiming for with this. Read more nigh that here.
j.L
-

I don't even...
j.M
-

...need my hands...
j.H
-

...to defeat you!
j.S
-

Anti-anti-air and combo extender
j.2H

Special Moves
Lightning Hammer
236L/M/H (Air OK)
-

Great range, leads into high harm, and crushes projectiles.
-

To anyone that says this game has too many lariats.
| Version | Damage | GuardHow this assail can be guarded. | SmashWhich type of cinematic this attack tin can trigger. | StartupShows how many frame that the corresponding motility needs to go through in order to reach its active frames. | ActiveShows how many frames where there is an attackbox, AKA the hitbox where if the opponent touches it, they volition accept damage. Occurs afterwards Startup. | RecoveryShows how many frames that the character must go through after its active frames to automatically go back to a neutral opinion. | Frame Adv.The difference between the aggressor's recovery and the period that the opponent is in blockstun. This Frame Advantage value is based off the fact that the very showtime agile frame touches the opponent. Throws list the amount of Frame Advantage upon successfully throwing the opponent. | Invul.The number of frames this attack has invulnerability, and what attribute(s) this invulnerability applies to. |
|---|---|---|---|---|---|---|---|---|
| 236L | grand | All | - | 13 | 7 | 19 | -four | iv-19 Projectiles |
| 236M | 500, 600 | All | U1+ → D1 | 17 | 7 | 19 | -4 | four-23 Projectiles |
| 236H | 500, 700 | All | U1+ → D1 | 13 | 7 | 19 | -four | 4-19 Projectiles |
- All
- Crushes all projectiles, including supers.
- All versions are medium starters, leading to farthermost damage on hit.
- M and H versions are hitgrabs, significant that both will trounce whatsoever sort of challenge and are unaffected by hitstun scaling.
- 236L
- Travels i/2 of the screen.
Mainly used equally an additional move option or to make sure a blockstring ends safely.
- 236M
- Travels almost fullscreen.
- Wallbounces with Smash, giving a philharmonic in the corner. Tin also extend combos midscreen with an airdash if yous're not too loftier.
- Gives a mediocre sliding knockdown if U1 has been used and D1 has not.
- Opponent tin can airtech if both Smashes accept been used.
Gogeta's chief combo extender besides j.2H. Air version leads to a rejump on every grapheme but Krillin midscreen.
Deadly frame trap option in the corner for having a higher reward on hit than 5H, and not being any less favorable on cake than the 50 version.
- 236H
- Travels nearly fullscreen.
- Ground bounces with Smash, giving a combo anywhere.
- Gives a bounce sliding knockdown if U1 has been used and D1 has not.
- Switches sides.
- Opponent can airtech if both Smashes take been used.
Buffered 6H(whiff)-3H is the best starter after this lands, and with the optimal ostend leads into 50%.
Good exit of jail complimentary card against projectile heavy characters with fantastic follow-ups and many lasting frames, key of Gogeta's neutral threat. As well corking for simply flying out of the corner.
Falling star Strike
214L/M/H (Air OK)
-

-

Pressure restarter, combo ender.
| Version | Damage | GuardHow this attack can be guarded. | NailWhich type of cinematic this set on can trigger. | StartupShows how many frame that the corresponding motility needs to become through in order to attain its active frames. | ActiveShows how many frames where in that location is an attackbox, AKA the hitbox where if the opponent touches it, they will have damage. Occurs after Startup. | RecoveryShows how many frames that the graphic symbol must become through after its active frames to automatically go back to a neutral stance. | Frame Adv.The difference between the attacker's recovery and the flow that the opponent is in blockstun. This Frame Advantage value is based off the fact that the very first active frame touches the opponent. Throws list the amount of Frame Advantage upon successfully throwing the opponent. | Invul.The number of frames this attack has invulnerability, and what attribute(south) this invulnerability applies to. |
|---|---|---|---|---|---|---|---|---|
| 214L | one thousand | High | D1 | 24 | three | 15 | -2 | - |
| 214M | 1400 | High | D1 | 30 | 3 | fifteen | +2 | - |
| 214H | 1600 | Loftier | D1 | 24 | iii | xv | +2 | - |
- All
- Overhead.
- Uses D Nail on hit.
- All versions can exist anti aired
- 214L
- -2 on block, allowing for a safe backdash.
- In the ballpark of +33 on most knockdowns, letting you SJ IAD j.H for a safejump.
Functions as an overhead mix-up and combo ender. Use after j.H > j.S when you don't take boom for a knockdown, simply keep in heed information technology grants less oki time if done so.
- 214M
- +2 on cake, allowing for RPS midscreen and pressure in the corner.
- In the ballpark of +55 on about knockdowns, giving yous a similar setup to a Smash j.H.
A sometimes move due to its startup, but practiced to utilize nonetheless as it's +2 on cake. It's also Gogeta's all-time okizeme ender if he still has D1 Smash available, usually in corner combos. You'll most likely use j.DR instead, just it's at that place nonetheless.
- 214H
- +2 on cake, allowing for RPS midscreen and pressure in the corner.
IAD j.214H can get Gogeta in from fullscreen and exist +two on block, but getting predictable volition end upward with you getting 2H'd. It'southward +2 like 214M and 24f startup like 214L, then using it to continue pressure isn't a bad idea.
Bluff Kamehameha
236S
-

-

"Did I scare y'all, DUMBASS?"
| Impairment | Baby-sitHow this attack tin can exist guarded. | BoomWhich type of cinematic this attack tin trigger. | StartupShows how many frame that the respective motion needs to go through in order to reach its active frames. | ActiveShows how many frames where at that place is an attackbox, AKA the hitbox where if the opponent touches it, they will accept damage. Occurs after Startup. | RecoveryShows how many frames that the character must go through after its agile frames to automatically go dorsum to a neutral opinion. | Frame Adv.The difference betwixt the attacker'southward recovery and the menses that the opponent is in blockstun. This Frame Advantage value is based off the fact that the very kickoff active frame touches the opponent. Throws list the amount of Frame Reward upon successfully throwing the opponent. | Invul.The number of frames this assail has invulnerability, and what attribute(s) this invulnerability applies to. |
|---|---|---|---|---|---|---|---|
| 500, 560 | Throw | U1+ | 24 | 3 | 36 | - | - |
- Tin only connect confronting grounded opponent. Cannot be combo'd into.
- Switches sides on hit, causes a wall splat. Allows for a philharmonic with Gogeta's back to the corner.
This has pretty good range for a command grab, every bit well every bit a deceptive animation, so you can utilize it if yous recall your opponent is blocking a bit also much to throw them off guard. Don't get reliant on information technology, as its startup is average for a control grab - and if the opponent catches on, they can backdash or jump out and punish you. When used in conjunction with his other tools like 6H, it becomes far more than strong.
Punisher Guard
214S (Air OK)
-

Counter Opinion
-

Catch
Plus Energy of Justice
22S
-

An extra defensive option, yet also a dandy knockdown just to exist certain.
Z Assists
Aid A
Finish Sign
-
Farm to Win
Assist B
Lightning Hammer
-
The adept i
Help C
Plus Energy of Justice
-
Good until you think most information technology for more than five seconds
Super Moves
Ultimate Impact
236L+K (Air OK) or 236H+S (Air OK)
-
-

-

Ground finisher
"Back to the corner with you!" -

Air finisher
Gogeta channels his inner Xrd Sol
| Impairment | Baby-sitHow this assault tin be guarded. | SmashWhich blazon of cinematic this set on tin can trigger. | StartupShows how many frame that the corresponding move needs to become through in order to reach its active frames. | ActiveShows how many frames where there is an attackbox, AKA the hitbox where if the opponent touches it, they will accept impairment. Occurs after Startup. | RecoveryShows how many frames that the graphic symbol must go through after its agile frames to automatically go dorsum to a neutral stance. | Frame Adv.The difference between the attacker's recovery and the flow that the opponent is in blockstun. This Frame Advantage value is based off the fact that the very get-go active frame touches the opponent. Throws listing the amount of Frame Advantage upon successfully throwing the opponent. | Invul.The number of frames this attack has invulnerability, and what attribute(s) this invulnerability applies to. |
|---|---|---|---|---|---|---|---|
| 2541 | All | UDV | 18+iv | - | - | -21 | eighteen-? All |
- Minimum harm: 754 → 808 → 862 → 916 → 970 → 1024 → 1078 → 1154
- Showtime hitting only minimum harm (DHC): 720 → 774 → 828 → 882 → 936 → 990 → 1044 → 1098
- Has Head property, making it vulnerable to 2H.
- Tracks the unabridged screen.
- Side switches on hitting for basis version. Regains side for air version.
- Ground version corner carries.
Tracks anywhere on the screen, but deals rather poor impairment without levels. At Level three or so, it might actually exist more worthwhile to utilise this than continue going for the Instant Kill every bit this becomes one of the most solidly damaging Level 1s in the game. Both the ground and air versions requite Gogeta oki, merely the setups are different. The ground version just leaves him in position to meaty with a button, simply the air version has enough advantage for an IAD or a 214M to cover all techs (except delay downwardly, of course).
Information technology's better advised to utilize this immediately subsequently any philharmonic ender equally information technology hits full-screen anyway, and you don't want to adventure whiffing this move after a sliding knockdown due to its longer-than-most start-up.
The air version can exist used to gear up Android 21's left/right, even if he was cornered to begin with. You lot can also DHC early for the same consequence without losing any impairment, merely you lot won't proceed the corner.
Ultra Big Bang Kamehameha
214L+M (Air OK)
-

-

Very skilful oki, often worth going for over Level 7.
| Damage | GuardHow this attack can be guarded. | SmashWhich type of cinematic this set on can trigger. | StartupShows how many frame that the respective move needs to become through in society to reach its agile frames. | ActiveShows how many frames where there is an attackbox, AKA the hitbox where if the opponent touches it, they will take damage. Occurs afterward Startup. | RecoveryShows how many frames that the character must go through afterwards its active frames to automatically get back to a neutral opinion. | Frame Adv.The divergence between the aggressor'southward recovery and the period that the opponent is in blockstun. This Frame Advantage value is based off the fact that the very kickoff agile frame touches the opponent. Throws list the amount of Frame Advantage upon successfully throwing the opponent. | Invul.The number of frames this set on has invulnerability, and what attribute(due south) this invulnerability applies to. |
|---|---|---|---|---|---|---|---|
| 4186 | All | UDV | nine+3 | - | - | -33 | ane-? All |
- Minimum damage: 1654 → 1708 → 1762 → 1816 → 1870 → 1924 → 1978 → 2054
- Adv. on hit: +44
Midscreen, a GO1 Bound/Moonjump can be used to close in on the opponent. That doesn't sound not bad by its self, simply Gogeta does accept access to an easy fuzzy overhead thanks to his double airdash. After a lvl3 in the corner, [9]j.M (whiff) > j.M will leave yous at the perfect acme to either IAD j.LM or land 2M . On almost characters, the IAD j.LM will exist a true blockstring as well equally a combo if the j.M continued. Y'all're also free to go for a DR or 236S after the j.M for additional layers.
This super as well can bargain some incredible impairment once Gogeta has levels. At Level 0, information technology'southward very poor, just getting to something similar Level three takes maybe a couple of seconds and turns it into a very solidly damaging level 3. Farther than that and you lot're in the top levels. If you take some levels built on the opponent, you might detect yourself having amend results going for the fuzzy overhead mixup to kill over gambling on connected levels to finish off their next character. After all, those levels will exist fifty-fifty easier to build when your opponent is downwards a character.
x100 Big Blindside Kamehameha
214H+S at Level 7 (Air OK)
-

"I've got something special for you!"
-

"Y'all'RE AS GOOD Equally Expressionless!"
| Damage | Baby-sitHow this assault tin can exist guarded. | NailWhich type of cinematic this set on can trigger. | StartupShows how many frame that the corresponding move needs to go through in order to reach its active frames. | ActiveShows how many frames where in that location is an attackbox, AKA the hitbox where if the opponent touches information technology, they will take damage. Occurs afterward Startup. | RecoveryShows how many frames that the character must get through later its agile frames to automatically go dorsum to a neutral stance. | Frame Adv.The difference betwixt the attacker's recovery and the period that the opponent is in blockstun. This Frame Advantage value is based off the fact that the very first active frame touches the opponent. Throws list the amount of Frame Advantage upon successfully throwing the opponent. | Invul.The number of frames this attack has invulnerability, and what attribute(s) this invulnerability applies to. |
|---|---|---|---|---|---|---|---|
| 540×54 | All | UDV | 25+3 | - | - | -51 | i-? All |
- Costs three Ki gauges
- Minimum impairment: 100%
- +twoscore on striking if you get it to not kill the opponent
Non reliable every bit a reversal due to its tedious startup and Gogeta leaping up making the beam whiff on crouching or modest characters at close range. However its extremely high damage and minimum damage is the reason for this; because this Super acts as a very versatile Instant Kill that can be combo'd from Smash 5H, U+ Blast 236M/j.236M, plus on block overheads, command grab, counter, DP, Smash Vanish, midcombo Sparking Blast and and so on.
The requirement of reaching Level seven tin can be made trivial with the right team. Fifty-fifty without his ain A assist, Gogeta can rack upwardly iii to iv Levels per combo with multi-part assists like ![]() xvi B
xvi B  Guard:
All Startup:
31 Recovery:
- Reward:
+31 or ![]() Piccolo A
Piccolo A  Guard:
All Startup:
21, 63 Recovery:
Total 79 Advantage:
+25 , not to mention that he tin can also gain Levels mid-blockstrings or during neutral. Once at Level 7, the threat of being IK'd past a random hit is always nowadays even when Gogeta is not the point character, since despite that yous tin't DHC into IK, it'southward possible to tag him in midcombo and exercise something like Vanish > j.214H+South instead. Accept control of the pace of the match every bit fearfulness of being robbed of their characters volition often make your opponent play hyper-offensive to stop Gogeta from achieving his win condition, or hyper-defensive to avoid existence executed.
Continue in mind that while it'due south practical to attain Level 7, Gogeta on his own is yet a really good graphic symbol that'south more capable of deleting the opponent's health bar without IK. Maintaining Levels tin be cumbersome at times since you'll take to avoid using Supers with Gogeta and wasting the Levels. If you're non edifice a team specifically around Leveling up, by the time you go to Level 7, the friction match might already be reaching its conclusion and IK wouldn't be any more useful than his other metered options.
As a side notation, while you tin can IK off of whatsoever stray hit so equally long as you lot have enough meter, it is best practise to employ your assists and push the combo as far as possible before ending with IK. The assists volition regenerate immediately after circular transition, so you lot'd desire to build extra meter to fight the next character.
| x100 Big Bang Kamehameha is a straight upgrade from
|
| Cake, run up to him as he falls down and punish the landing recovery. Regardless of ground or air block, you ever accept enough time to dash fullscreen towards him and punish with M buttons. If y'all're behind Gogeta, either patiently wait for him to state and punish every bit usual, or hit him out of the Super with a 2H. If you lot're not on course to a Perfect victory, practise not Reflect the axle. Frame advantage on block vs Reverberate is near identical, positioning does not thing whatsoever because the punish is guaranteed, but blocking will build yous 1.458 bars at the price of 1458 blue health. That'southward 6.66 (repeating of course) times the meter gain per blue health rate of getting hit by a DP. |
Colors
| 120x120px | 120x120px | 120x120px | 120x120px | 120x120px | 120x120px |
| | | | | | |
| 120x120px | 120x120px | 120x120px | 120x120px | 120x120px | 120x120px |
| | | | | | |
| 120x120px | 120x120px | 120x120px | 120x120px | ||
| | | | | ||
| | |||||
External References
Click [★] for character's full frame data
System Explanations

Super Saiyan 4 Gogeta Dragon Ball Fighterz,
Source: https://www.dustloop.com/wiki/index.php?title=DBFZ%2FSS4_Gogeta
Posted by: thompsonwhighletwor1959.blogspot.com
0 Response to "Super Saiyan 4 Gogeta Dragon Ball Fighterz"
Post a Comment